Member
List Management Documentation |
Member
List Management Screen Shots |
Members
List Management Members
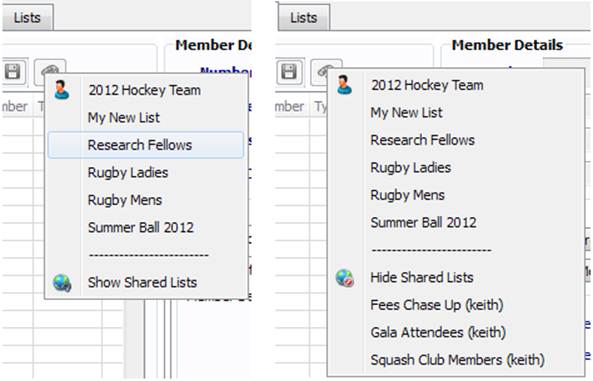
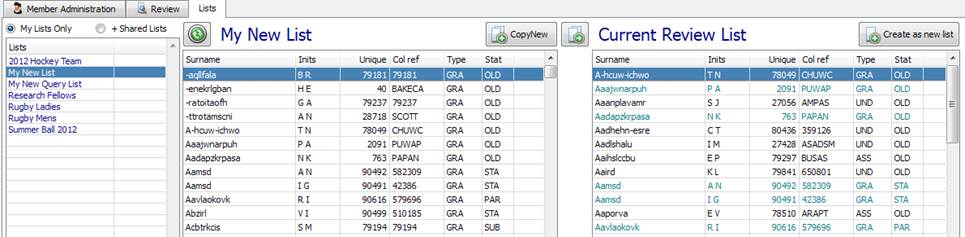
List Management is performed within the Member Administration, under the List Management ‘Lists’ page and Quick Lists section of the main page. List
Management allows for the grouping of members for quick access, either
personally or for a selection of other users. The definition of a group is
entirely down to the user. Members can
be grouped based upon a single database search using Find,
many separate searches or even individual members added one at a time. There are
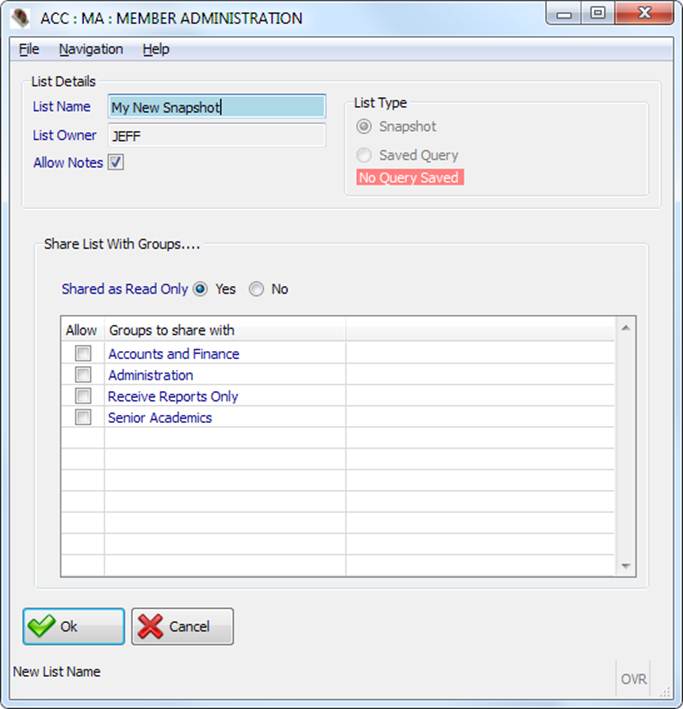
two types of list, Snapshot and Query. Lists are
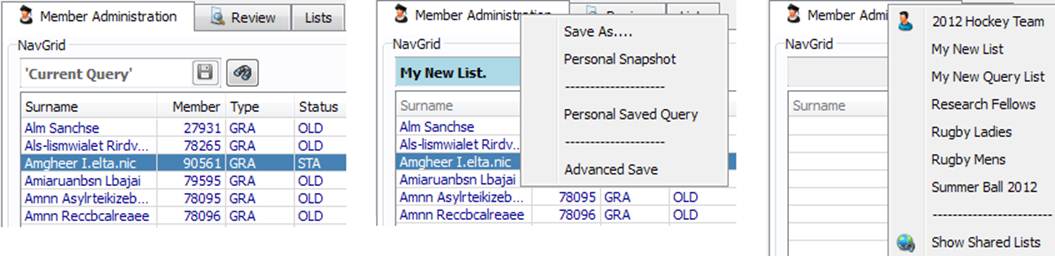
created in one of two places in the Member Administration system - the ‘Quick List’ section above the ‘Navigation Grid’ (NavGrid) on the Member Administration page and through
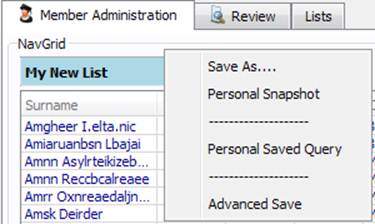
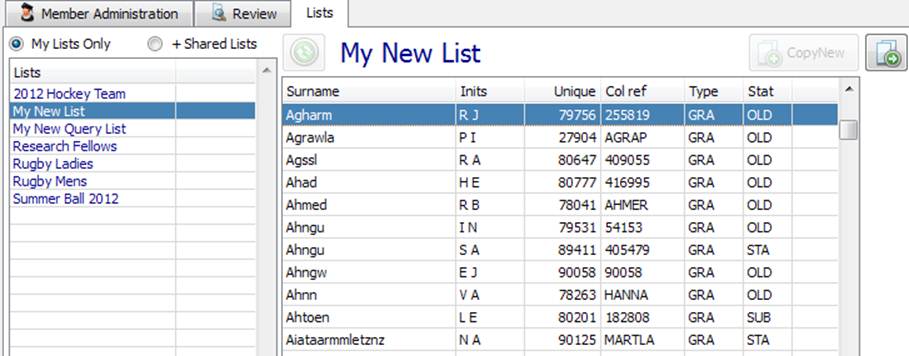
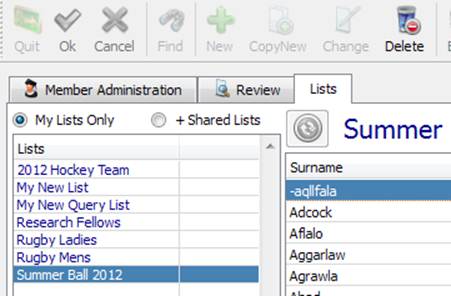
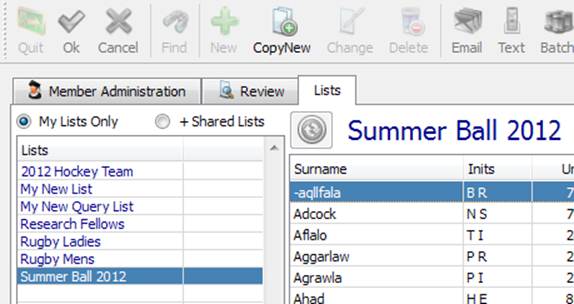
the List Management ‘Lists’ page. Quick Lists can be saved in just a few clicks. Find
your members in a database search, enter a list name above the Member
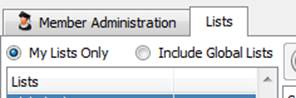
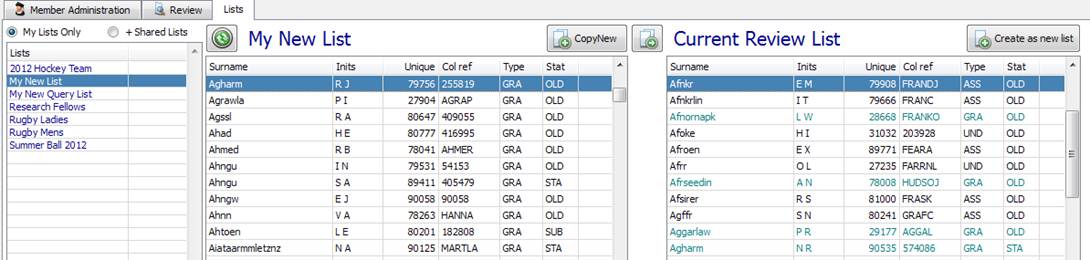
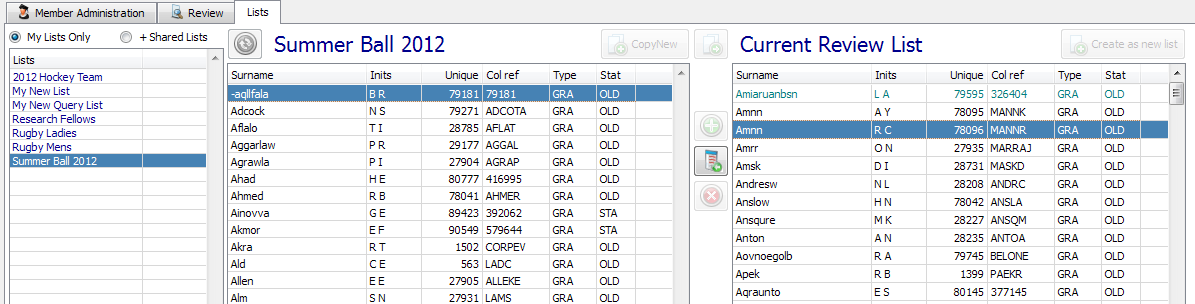
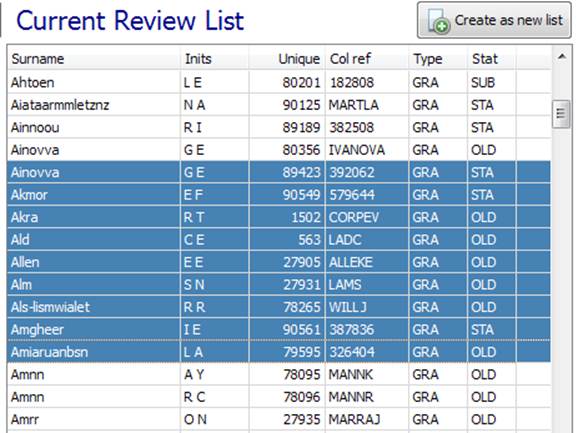
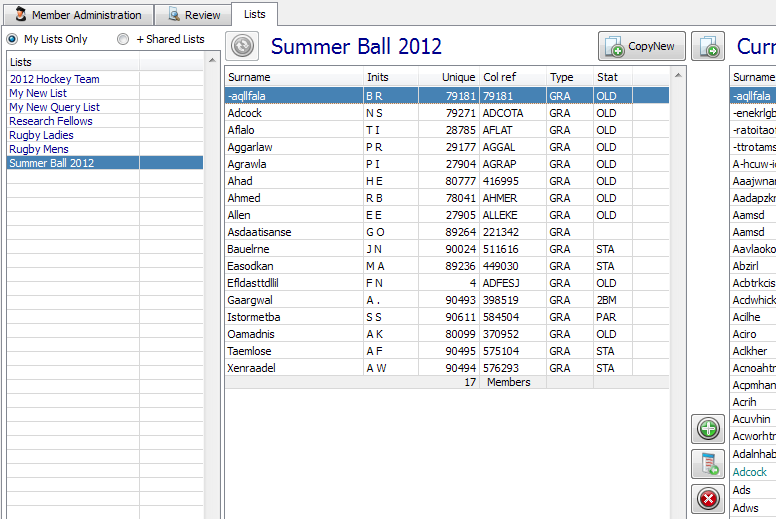
Navigation Grid, click save and choose the list type. Simple – and quick. The List Management page allows for much more control
and is for creating more complicated lists and for managing existing lists. |
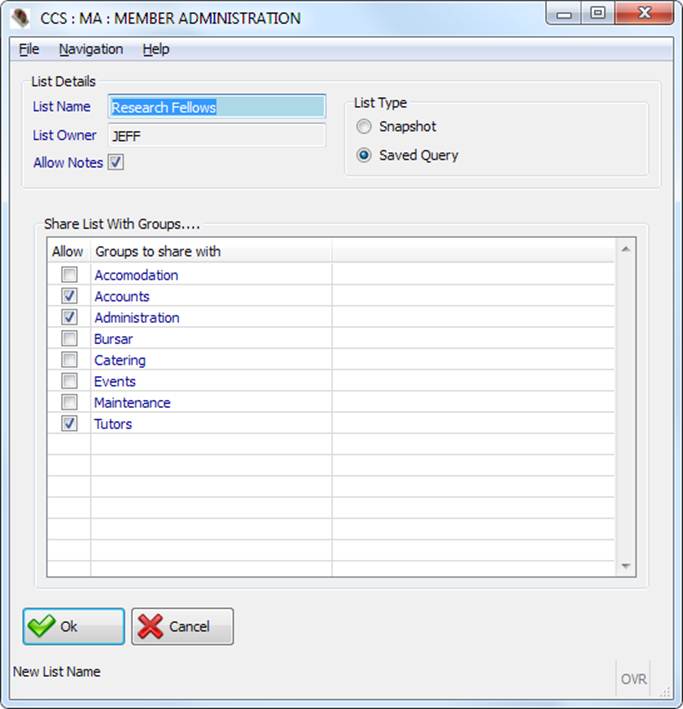
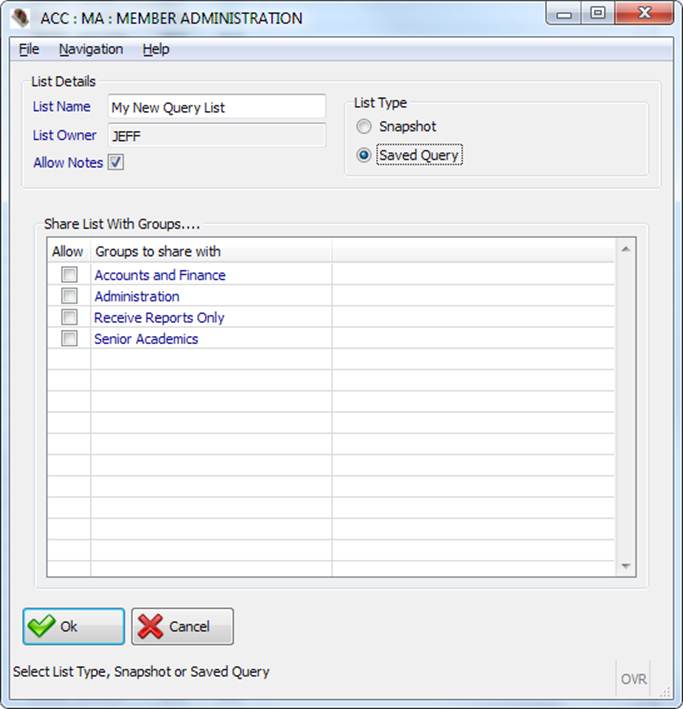
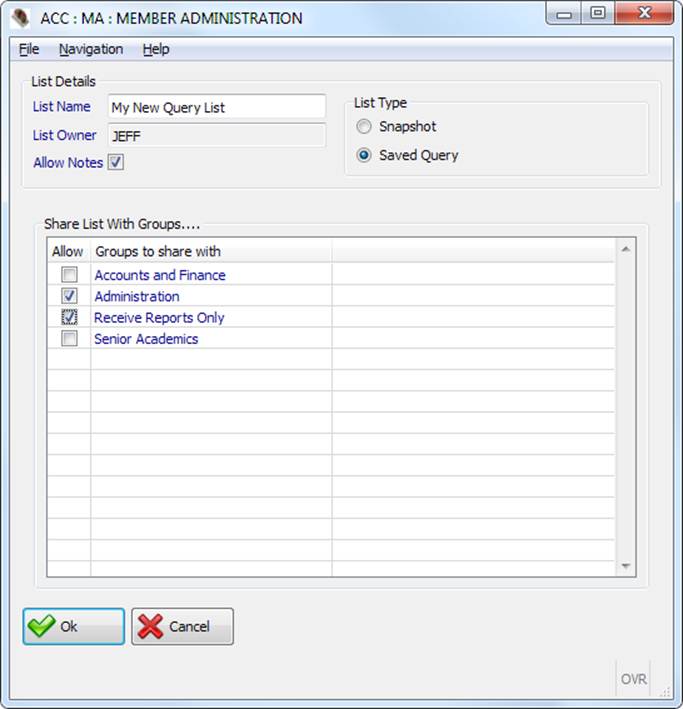
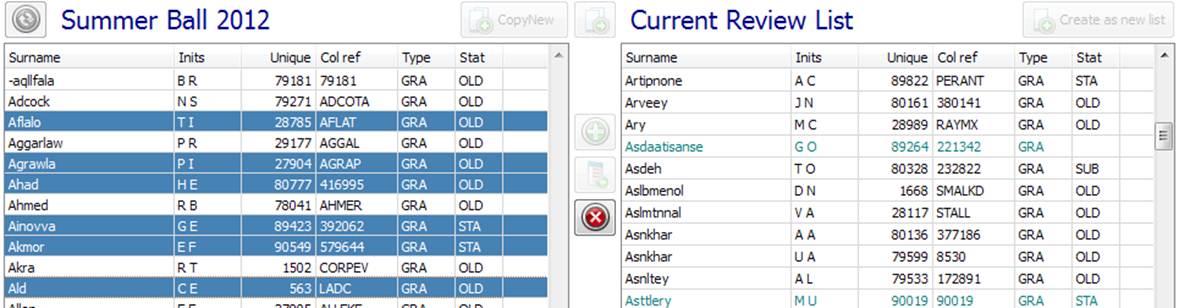
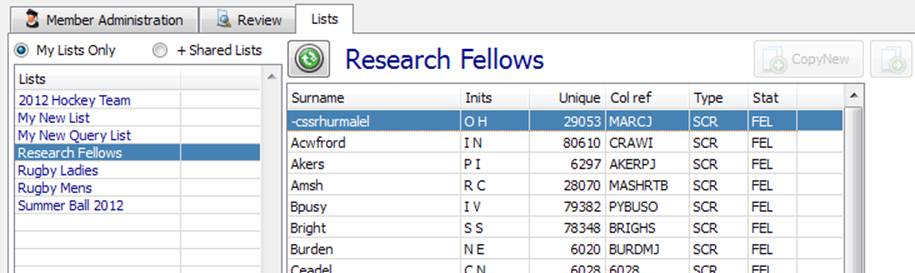
Figure 1: What are lists for? Whatever you want. Who can go in a list? Anyone you want 
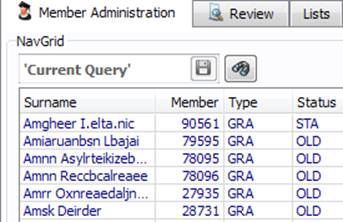
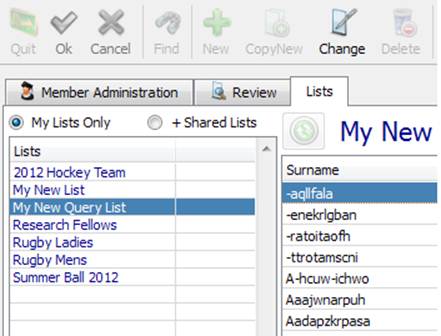
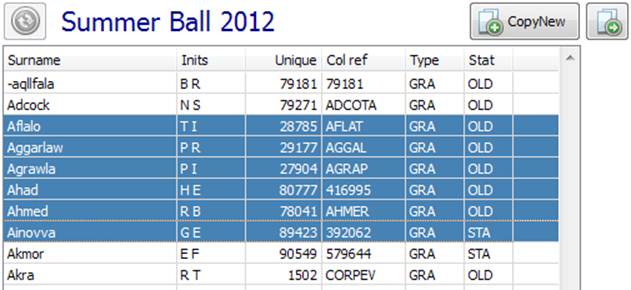
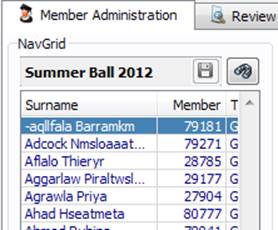
Figure 2: Quick List features are just above the Member Navigation Grid (NavGrid) |
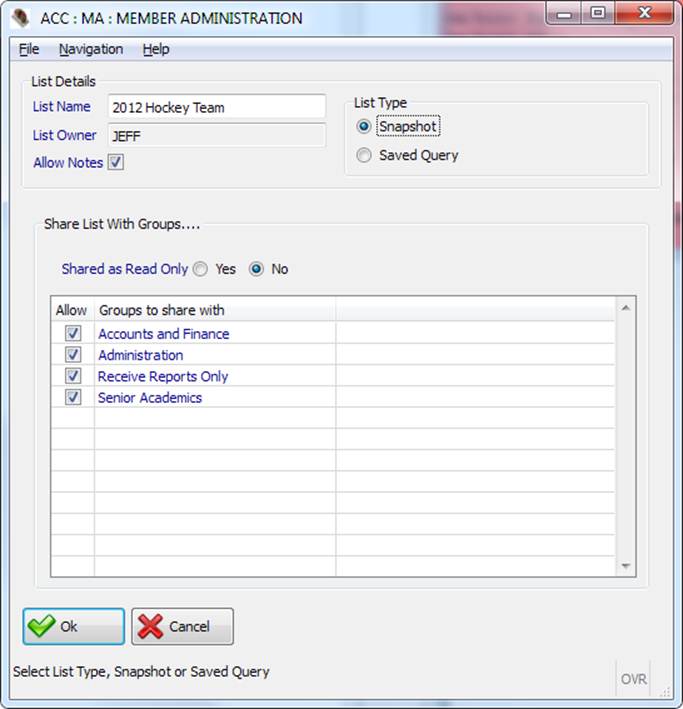
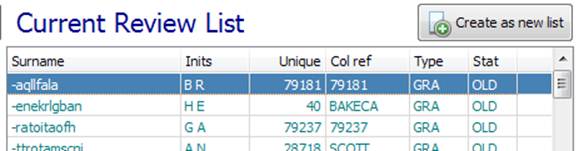
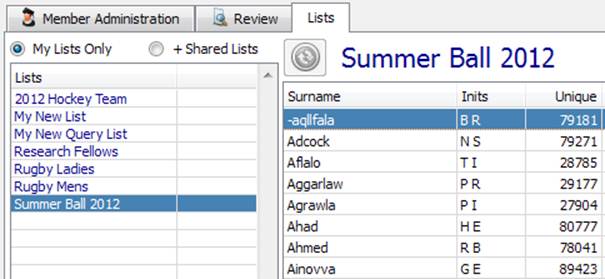
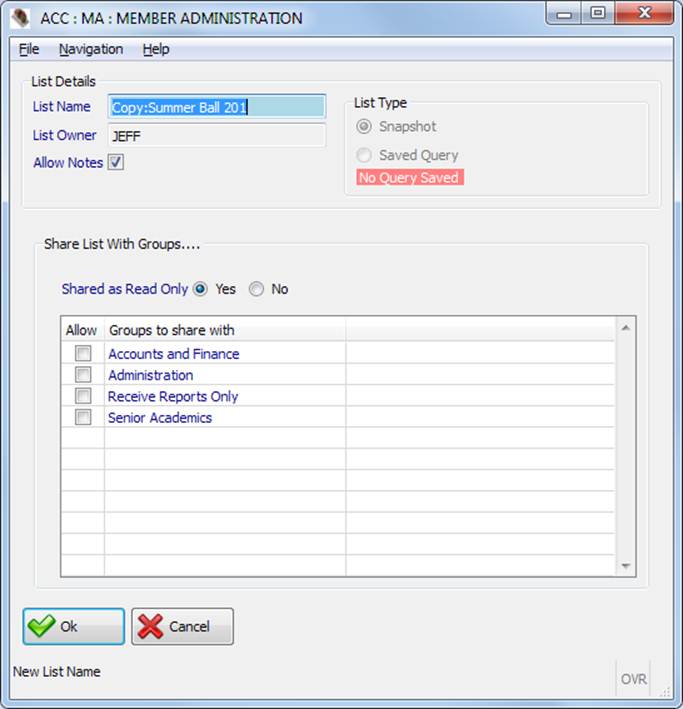
There are two types of list that can
be saved, Snapshot and Query. A Snapshot List saves a link to all
members of the list. The members in the list do not change unless you add or
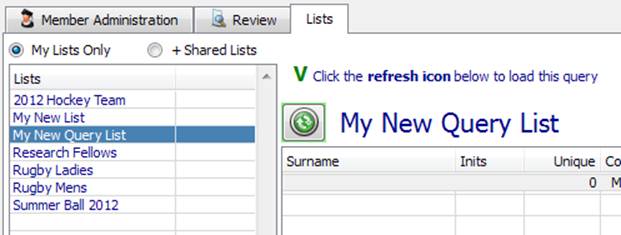
remove them manually through List Management. A Query List holds no links to any
members, instead storing the database search used to find them. This search
is re-run every-time you open the list. Members
cannot be added or removed from a Query list and the list is ‘dynamic’ – i.e.
it can change every time you open it because it always searches the member’s
database. A real life
example might be to answer the question ‘Who is in the dining hall?’. With a snapshot you would only enter the room once and
write down who is in there, creating a permanent, fixed record. With a query
you go back to the dining hall each time to see. More work but always
up-to-date. |
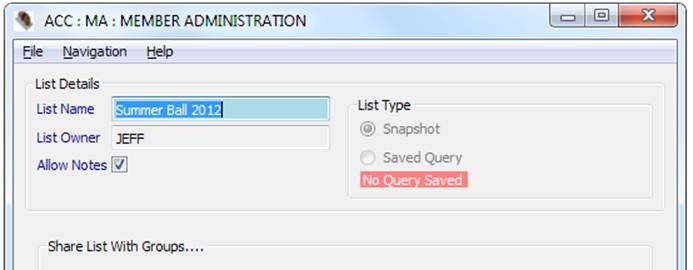
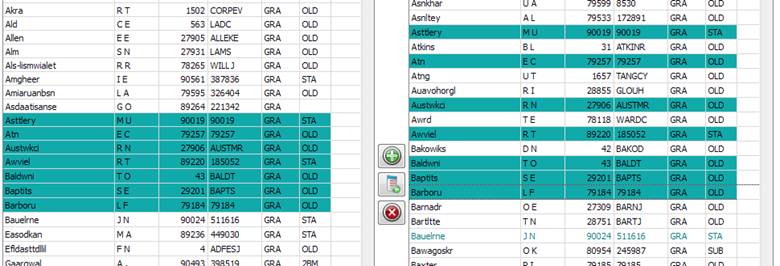
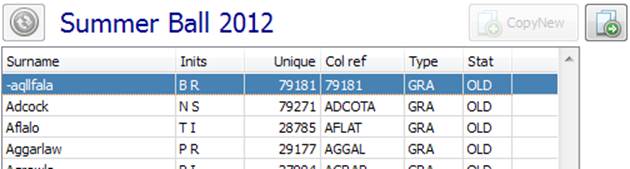
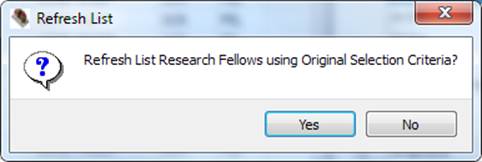
Figure 3: Lists come in two flavours – SNAPSHOT: a static list, or QUERY: a dynamic, updating list |
Shared Lists By default, a list is a ‘personal’
thing but you can easily share these lists with groups within the College. Any number of groups can be shared
with and, as list controller, you can change these at any time. Lists do not have to be shared and
by default are ‘personal’. Snapshot Lists can be shared as
‘Read Only’ where only the list creator can manipulate the lists members. If
not shared as ‘Read Only’ anyone you share the list with can add and remove
members. |
Figure 4: Lists can be PERSONAL, or open for everyone to see, and potentially update |
Quick Lists provides a fast and
simple way to use lists. The quick lists section sits just
above the Member Navigation Grid (NavGrid) on the
main Member Administration page. Quick Lists provides the ability to save a single database search to a new list or load existing lists into the Member Navigation
Grid. |
Figure 5: The Quick List section allows you to save a database search and retrieve saved lists - all from the comfort of the main Member Administration Page |
Saving
a Quick List Once
you have searched the database, found a group of members and can see them in
the Member Navigation Grid on the Member Administration tab, you are ready to
save them to a new list. To
do this, Click the box marked ‘Current Query’.
This text will be cleared ready for you to enter your new list name. Enter
the name and once you are happy, click the save icon Remember,
lists must have a unique name. For personal lists it must be unique to you and
there must not be a shared list with the same name. This
means everybody could call one list
My List, but only one – as long as there is not a shared list named My List (Who would call a shared list
my list anyway? Mistakes happen!). Don’t
worry though – we’ll warn you if one exists by turning the field red. |
Figure 6: Find your members Figure 7: Enter your list name and
click the save icon Figure 8: Select your list type – Personal Snapshot or Personal Query Figure 9: We won't let you save a duplicate – maybe just add a ‘2’ to the end. Or think up a proper name! |
Loading
a Quick List When
you need access to a previously saved list (no matter how saved) you can
click the zoom icon You
are presented with a menu of personal lists. Click the list you want to load
and hey presto – your members are retrieved. If
you want to load a shared list, click Show Shared
Lists at the bottom of the menu, and a new menu will appear – this
time with personal lists at the top and lists shared with you below. This
selection (Show Shared Lists) will be remembered until you exit Member
Administration or select Hide Shared Lists from
the Quick Lists menu. |
Figure 10: Click the zoom icon Figure 11: Your personal lists will then be listed for you to select. Click the one you want or click 'Show Shared Lists'. Click Hide Shared Lists to stop |
The List Management ‘Lists’ page can
be found in Member Maintenance. Whilst Quick
Lists aims for simple list management for simple lists, List Management
aims for simple management of sophisticated lists. List Management allows you to: The List Management screen is broken
down into three sections – saved lists (left hand side), list members (centre
panel) and Current Review List on the right. The Current Review List is the
query result set you are working with in Member Administration and Review
pages. Any members in your Current Review
List who exist in the highlighted list are shown in teal,
while members not in the list remain in black to clearly identify any you may
wish to add. |
Figure 12: List Management page can be found in the 'Lists' page in Member Administration Figure 13: Top Toolbar options for what you can do with lists Figure 14: Creating a list from the current query is one click away... Figure 15: Moving members from the current query to an existing list is just about pushing the right buttons. Green members are already in your list! |
Within List Management, you can move
up and down the left hand list of personal saved lists, or select ‘+Shared
Lists’ to additionally view lists others have shared with you. When you move to a ‘Snapshot’ the
list of members will be shown in the list members section. Unlike Snapshots, Saved Queries do
not immediately show their members when the list name is highlighted. This is
because a Saved Query must read the database each time to fetch members. To display members of a Saved Query
in Lists Management you need to click the ‘Refresh List’ button. When you are dealing with a Saved
Query this is made obvious on screen with a message informing how to refresh,
and a green glow around the refresh button. |
Figure 16: Navigate the lists to show the list members Figure 17: Click the refresh button (highlighted green) to load a Saved Queries members |
Within List Management you can
either create a new blank list to add members to
afterwards, or create a new list from your
Current Review List. |
Figure 18: Click New to create a blank list, or click 'Create as new list' to save you Current Review List |
To create a blank list click the New icon When creating a blank list it must
be a Snapshot list, meaning a link is saved for each
members added to this list. This is because there is no database query to
save. As with all lists you can select
‘User Groups’ to share the list with. Snapshots can be shared as ‘Read Only’
– where only the creator of the list can make changes. Queries are, by their
nature, always read only. Finally select if notes can be made
against the members on this list? When you tick to ‘Allow Notes’ you can make
notes against each member within the List Management page. Click Ok to
save your new (empty) list. |
Figure 19: Enter the new list name, keep it personal or share it and select if notes be made in list management? |
Create
List from Current Review The fastest way to get a new list up
and running within List Management is to click Create
as new list, having already done a search on the member’s database in
Member Administration. This instantly saves the members you
found into a new list. Depending on which list type
you choose you can then add members to or remove members from your new list (when saving as a
Snapshot). Enter the list name and choose the type of the list and any shares you want. Finally, can
notes be made against the members on this list? When you tick to ‘Allow
Notes’ you can make notes against each member within the List Management
page. Because you performed a database
search to find the members you can save this list as type Query
–it will always refresh when you open it – or Snapshot
allowing you to manipulate the members in the list. Click Ok to save your new, populated list. |
Figure 20: Enter the list name, choose to save it as a Snapshot or Query, personal or shared and can you make notes? Figure 21: Your new list has been created from your Current Review List |
Change
Existing List Properties Once
a list has been created you are able to change its properties – the name, type, share
and notes selections. Highlight
the list and click the Change Icon The
List Properties window will open. Here you can change the list name, the list type – Snapshot or Query, Shares and
notes flag. If
the list wasn’t created from a database query (i.e. it was created as blank
list) then you won’t be able to save it as a query – only a snapshot. If
this list was created from a query – even if saved as a snapshot – you can
change it to become a Query. Warning:
Any manipulation of the list (i.e. members added, or members deleted) will be
lost if you change a snapshot to a query. This is because the links between
the members and this list will be severed and the query re-run each time the
list is opened. Once
you are happy with your changes, click Ok to
save them away. |
Figure 22: Select your list and click the Change Icon on the top Toolbar Figure 23: You can change the name and list type, notes selection and any shares. Changing to a Query though will lose any changes you had made to the members Figure 24: Remember - Lists created without a database search (i.e. as a blank list) can never become a Query |
Any personal list or shared list*
saved as a Snapshot allows you to manipulate the
members in the list through List Management. This means you can add members or remove members
from the list – even if that list was created from a query. You can also select members in your
list and remove them by following the instructions to delete
members from a list. *You
cannot change a ‘Shared as Read Only’ list unless you created it. |
Figure 25: You can delete members from lists or drag new ones in from the Current Review List |
To add members into a list you must
start with members in your ‘Current Review List’. You can do this either by searching
for members in the usual way or make another list your
current review List. Once you have members in the Current
Review List, select the ones to move into your list, or add all. To
add all members: 1.
Highlight
the list you wish to add members to. 2.
Click
the Copy All Items icon To List icon To
add selected members: 1.
Highlight
the list you wish to add members. 2.
Select
the list members in the Current Review List to add. ·
To
select a range click the highest member to add, then hold Shift whilst
clicking the lower member ·
To
select members not all together click the first member you want and then
pressing and holding Ctrl key, click all additional members 3.
When
you have all the members you want click the Add Selection icon 4.
Alternatively
you can the click and hold on of the selected members (i.e. left mouse button
down but do not release) and then drag the mouse onto your list members grid
releasing the mouse button to drop all selected members All changes are effected
immediately. Members just added are highlighted with a teal background until
you add more members, change list or leave the List Management page. You can do this as many times as you
wish. You are also free to return to Member Administration and perform new
searches to find additional members to add to the list. Drag
to another list: In addition to the above methods you
can also drag a selection of members (click and hold the mouse left button)
and drop them (release the mouse button) onto one of your list names. The
list you drop to will become the currently highlighted list. |
Figure 26: To make a list current,
highlight the list and click the Make List Current Icon Figure 27: Click Copy All Items to
List Icon Figure 28: To select a range, click the highest member you need, the Shift+Click the lower member you need Figure 29: Ctrl+Click
allows for several members to be selected. Click the Add Selected icon Figure 30: The last batch of members added are highlighted in both lists until you add more, change list or move off the Lists page |
To remove members from a list: 1.
Highlight
the list you wish to remove members from. 2.
In
the list of members, select the member or members you wish to remove. ·
To
select a range click the highest member to add then hold Shift whilst
clicking the lower member ·
To
select members not all together click the first member you want and then
pressing and holding Ctrl key, click all additional members 3.
When
you have selected the members to, click the Remove Selected From List icon All changes are effected
immediately. |
Figure 31: To select a range, click the highest member you need, the Shift+Click the lower member you need Figure 32: Once members have been
selected, click the Remove Selected From List icon |
You can delete an existing list
within List Management. 1.
Highlight
the list you with to remove. 2.
Click
the Delete button on the top Toolbar 3.
Confirm
you wish to delete the list by clicking Yes. |
Figure 33: Highlight the list you want to delete and click Delete on the top Toolbar Figure 34: Confirm that you wish to delete the list |
You can copy any existing list to a
new list, and if required, change the List Types and
shares of the new list. One great reason for doing this is
to have a ‘Saved Query’ (for instance Graduates) which brings up a refreshed
list when loaded and then copy the list to a ‘Snapshot’ – perhaps called
‘Grads Sept2012’. To make a copy: 1.
Highlight
the list you want to copy. 2.
Click
CopyNew on the top Toolbar. 3.
Enter
details for the new list, changing list type and scope where necessary. 4.
The
new list will be created, including the members that are attached to the
existing list*. *Where
a list is saved as a query then no member details are saved and the list will
be generated from the saved query each time it is opened. |
Figure 35: Highlight the list you wish to copy, then click CopyNew from the top Toolbar Figure 36: Enter the details of the new list. This includes list type and scope |
In List
Management, highlighting the list you want to make your Current Review List
and click the Make Current List icon |
|
Whenever you have a Snapshot that
was created from a query, you have the ability to refresh it. This will re-query the database to
give a new, up-to-date selection of members and save this new set as the
snapshot. To perform a refresh: 1.
Highlight
the list you want to refresh. 2.
Click
the Refresh Icon 3.
Confirm
that you wish to refresh the list by clicking Yes. Warning: Any manipulation of
the list (members added or removed) will be lost as a complete refresh is
performed to synchronise the list with the database |
Figure 37: Highlight the list to
refresh and click the Refresh Icon Figure 38: Confirm you want to refresh. Remember: Changes will be lost |