|
Mercury
Diary Documentation |
Mercury
Diary Screen Shots |
|
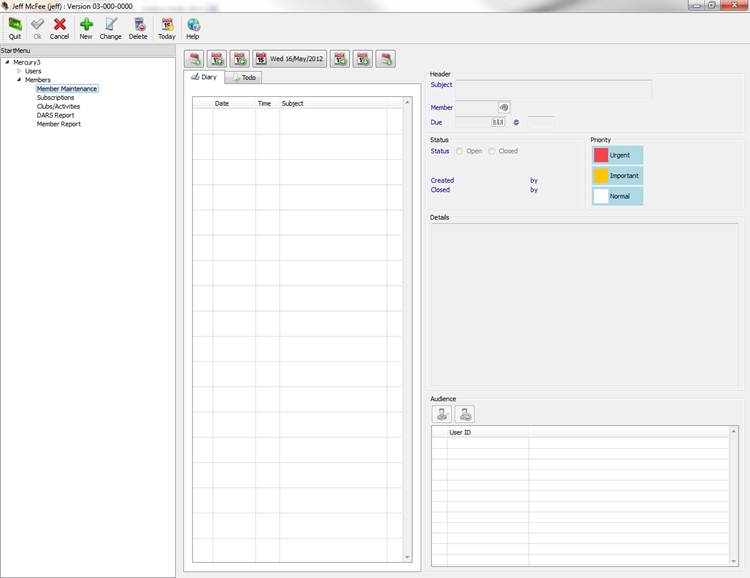
Mercury
Diary The Mercury
Diary is your way of scheduling appointments and highlighting tasks to be
performed within the Mercury system. The Diary
contains standard ‘appointment’ functionality as well as your ToDo List. Diary and todo
entries can also be linked to other areas of the Mercury system, although
initially this is limited to Members records. The Diary
has replaced the Mercury menu system so that it is ever present while you are
logged in and allows for regular checking of your diary and todo list. The diary
allows you to add, close, delete and update appointments and todo items
manually within the diary. Much of the
power though comes from its links to the other systems. Presently only Member
Maintenance is linked – allowing diary appointments and todo items to be
created against Member records from within Membership Administration –
although other systems will incorporate the changes to take advantage of the
diary functionality. Another
powerful feature is the inclusion of ‘Diary Groups’. This allows functional
groups of users to be created (such as ‘Accounts’) and entries to be created
against the group rather than individuals. To view a
diary entry, click the diary item in the list of entries. To View a todo
entry, click the ToDo page and click a todo list item. The key tasks
within the Diary System are:
|
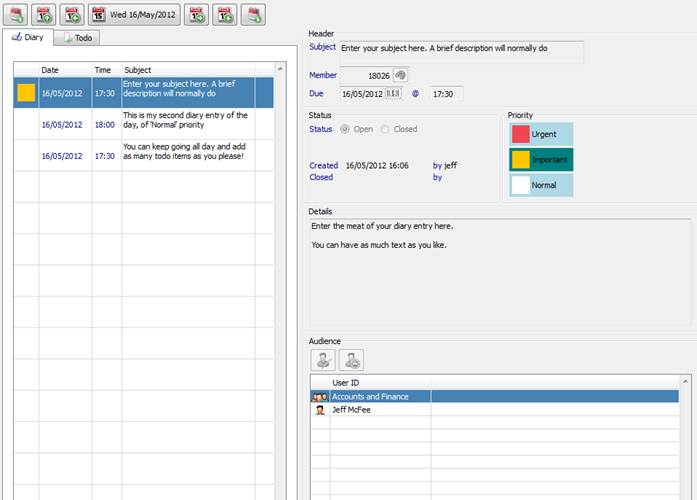
Figure 1: Your Diary can be found on the main Mercury Menu System - always ready and waiting
Figure 2: Actions are held on the top Toolbar
Figure 3: Navigate the diary one day, one week or one month at a time - or just click the date and enter a new one |

|
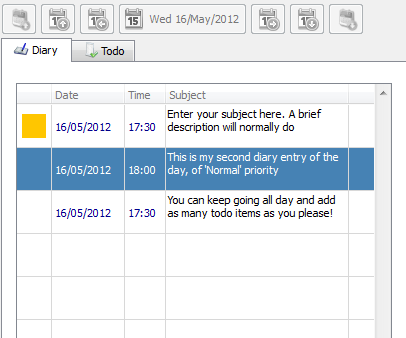
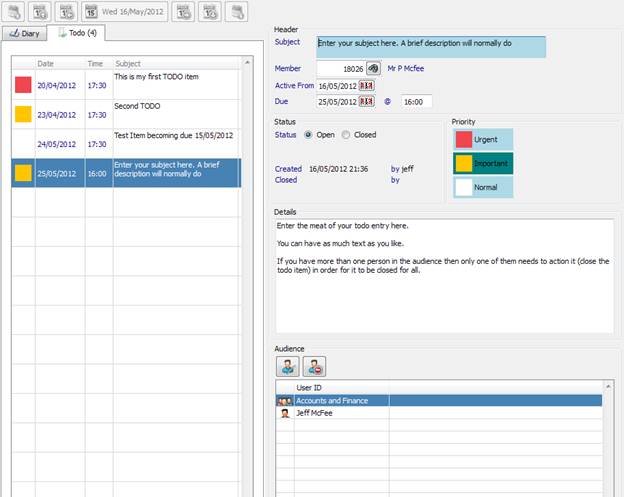
The diary is split into two sections
– Diary and Todo. To swap between them click the appropriate page tab below
the date navigation controls. You can then choose which date to
view the diary for. The date navigation controls are
(from left to right): ·
·
·
·
·
·
·
Plus, on the top Toolbar: ·
This will show entries that are
relevant on that day: ·
Diary
entries will be shown that are scheduled during that day only ·
Todo
entries will be shown that are not yet complete with a blank active from
date, or an active from date of today or earlier. ·
Todo
entries that were closed on that day will also be shown. When you have a list of diary/todo
entries click on the one you want and the details for that item will be
shown.
|
Figure 4: Date Navigation Controls (top) and Page Navigation Controls - Diary page tab and Todo page tab (below)
Figure 5: Click on the diary/todo entries that are shown for the selected date to show their detail |

|
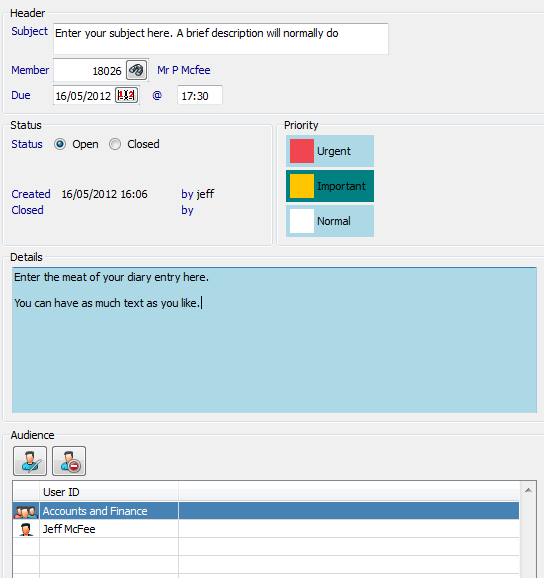
To create a new diary entry: 1.
Click
the New icon 2.
Enter
the subject, date and time of the appointment and details of the diary entry. 3.
If
required, link it to a member by entering their member number or clicking the
zoom icon 4.
Select
the priority for this entry. Urgent and Important items will be highlighted
as such on the diary. 5.
By
default the entry is created in your diary. If you want to add this entry
into the diary of other users or groups of users click the Edit Audience icon
6.
Click
Ok to save the diary entry.
|
Figure 6: Click the New Icon
Figure 7: Enter the details of the diary entry, linking to a member if necessary |
|
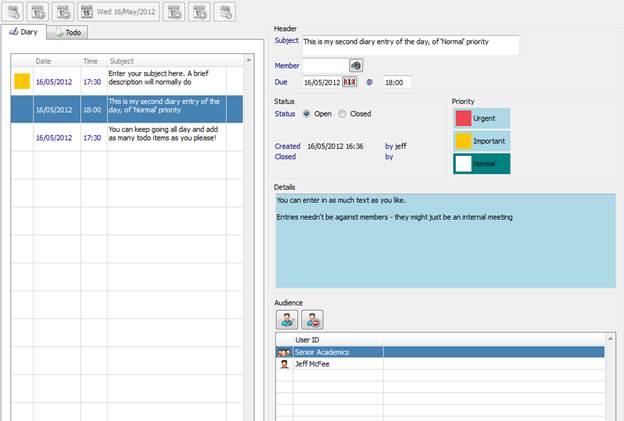
To create a
new diary entry: 1.
Highlight
the item to change in the list of today’s entries. 2.
Click
the Change icon 3.
Change
the subject, date and time of the appointment and details of the diary entry. 4.
Link
it to, or change the linked member by entering their member number or
clicking the zoom icon 5.
Set
the priority for this entry. Urgent and Important items will be highlighted
as such on the diary. 6.
Change
the diary audience to add this entry into the diary of other users or groups
of users click the Edit Audience icon 7.
Click
Ok to save the diary entry.
|
Figure 8: Click the Change icon
Figure 9: Just as with creating an entry - just fill in the details and click Ok on the top toollbar |
|
To delete a diary entry: 1.
Highlight
the item to delete in the list of today’s entries. 2.
Click
the Delete icon 3.
Confirm
that you want to delete the entry by clicking Yes.
|
Figure 10: Select the entry to delete
and click the Delete Icon
Figure 11: Select the diary entry to
delete and click the Delete Icon |


|
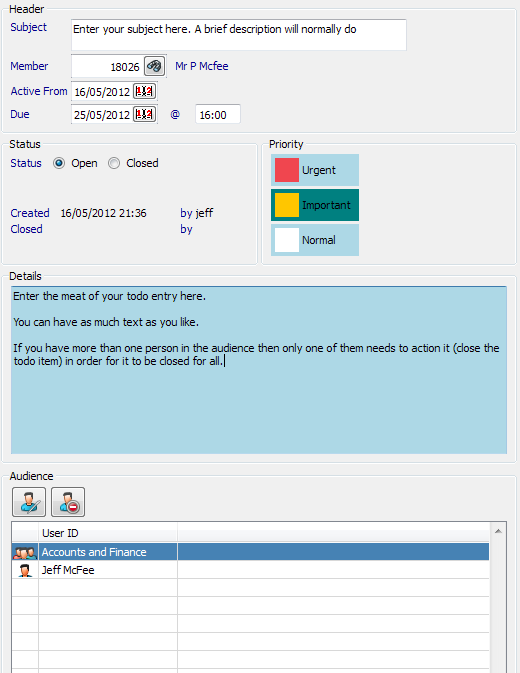
To create a new todo entry: 1.
Click
the New icon 2.
Enter
the subject, date and time of the item is due to be completed, and if
applicable the date at which the item will show up on todo lists (the Active From
date). 3.
If
required, link it to a member by entering their member number or clicking the
zoom icon 4.
Select
the priority for this entry. Urgent and Important items will be highlighted
as such on the todo list. 5.
By
default, the entry is created in your todo list. If you want to add this
entry into others user or groups of users todo lists click the Edit Audience icon 6.
Click
Ok to save the todo entry.
|
Figure 12: Click the New Icon
Figure 13: Enter the details of the todo entry, linking to a member if necessary |
|
To create a new todo entry: 1.
Highlight
the item to change in the todo list. 2.
Click
the Change icon 3.
Change
the subject, due date and time of the appointment, when it’s active from and
details of the diary entry. 4.
Link
it to, or change the linked member, by entering their member number or
clicking the zoom icon 5.
Set
the priority for this entry. Urgent and Important items will be highlighted
as such on the todo list. 6.
Change
the diary audience to add this entry into the diary of other users or groups
of users click the Edit Audience icon 7.
Click
Ok to save the todo
entry.
|
Figure 14: Click the Change icon
Figure 15: Just as with creating an entry - just fill in the details and click Ok on the top Toolbar |
|
To delete a todo entry: 1.
Highlight
the item to delete in the list of today’s entries. 2.
Click
the Delete icon 3.
Confirm
that you want to delete the entry by clicking Delete
rather than closing the entry.
|
Figure 16: Select the entry to delete
and click the Delete Icon
Figure 17: Select the todo entry to
delete and click the Delete Icon
Figure 18: Choose that you want to Delete rather than Close (as completed) the todo list entry |
|
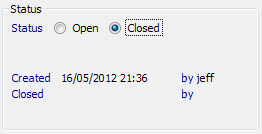
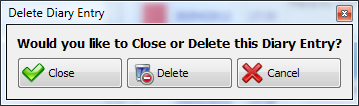
There are 2 ways to close a todo
list item: 1.
Highlight
the item to close in the list of today’s entries. 2.
Click
the Change icon 3.
Change
the status to Closed 4.
Click
Ok to save the changes Or alternatively: 1.
Highlight
the item to close in the list of today’s entries. 2.
Click
the Delete icon 3.
Confirm
that you want to close the entry by clicking Close rather
than deleting the entry.
|
Figure 19: You can close a todo entry
by clicking either Change
Figure 20: Highlight the item you wish to close
Figure 21: If you use change mode, you can select the status 'Closed'
Figure 22: If you use delete mode, you get to choose 'Close' from the confirmation window
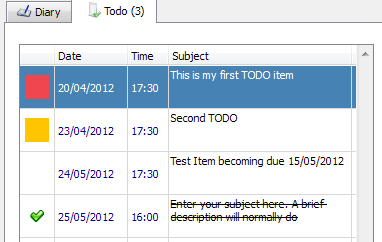
Figure 23: Closed items appear on the day they closed, but crossed through and ticked |
|
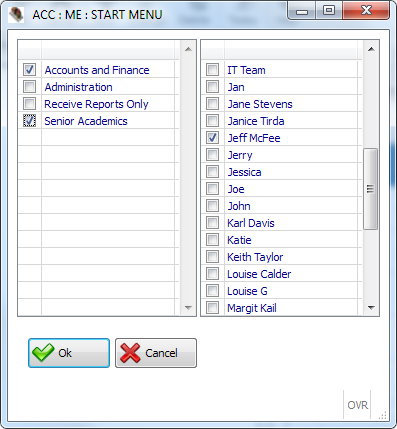
When in New or Change mode you can click
the Edit Audience icon This will allow you tick groups, or
individual users for the diary or todo entries. Click Ok
to accept the selection.
|
Figure 24: Tick the groups or users and click Ok to accept them |